With Scolago, there are three types of notifications: email notifications, instant notifications (those sent to your mobile with the Scolago app), and the Notifications Center on the platform.
 | Caution, no notifications are sent via text message. We recommend downloading our free app from the App Store or Play Store to receive notifications on your phone. |
To configure the notifications you receive from Scolago, click on your name at the top right and then on My profile. Go to the Settings tab.
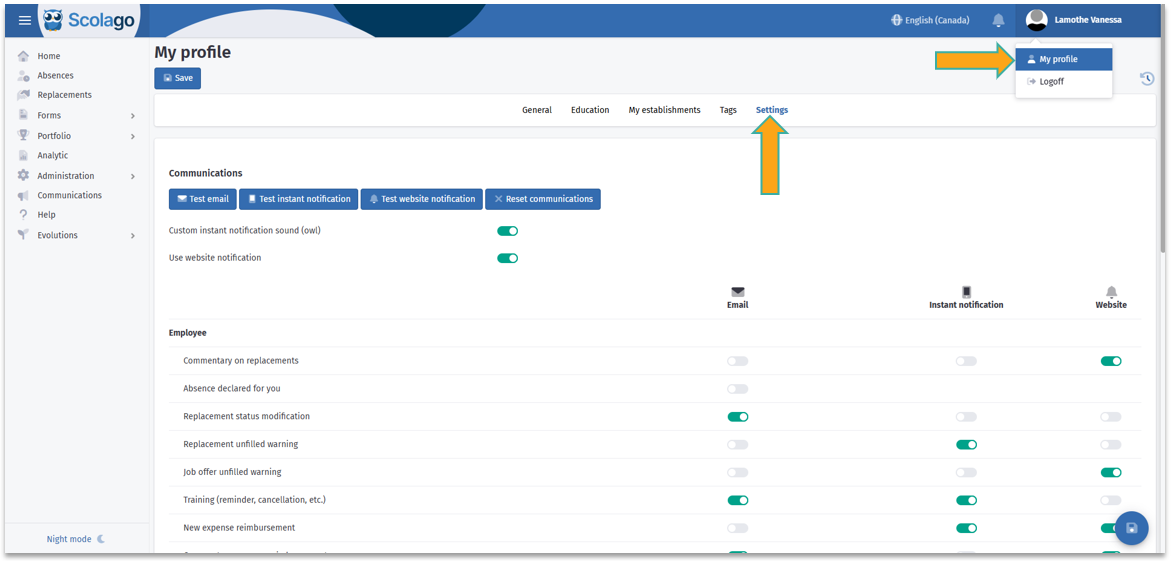




Below those buttons, two toggles are available.
 | |
 | Starting October 31, 2025, following requests from several users, Scolago will offer a unique notification sound to easily distinguish our application's notifications from others installed on your phone. If you wish to disable this option, simply deactivate the Custom instant notification sound (owl) switch. |
 | |
 | This toggle allows you to completely disable web notifications, meaning the notifications that appear under the bell icon in the top right corner of your platform. The bell icon will then be removed from your platform. This saves you from having to disable each web notification individually, saving you time in the process. |
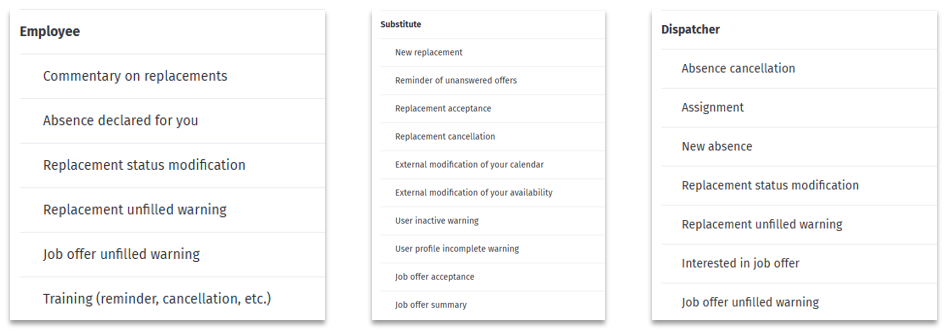
You can toggle the switches on and off as you wish. Don’t forget to save.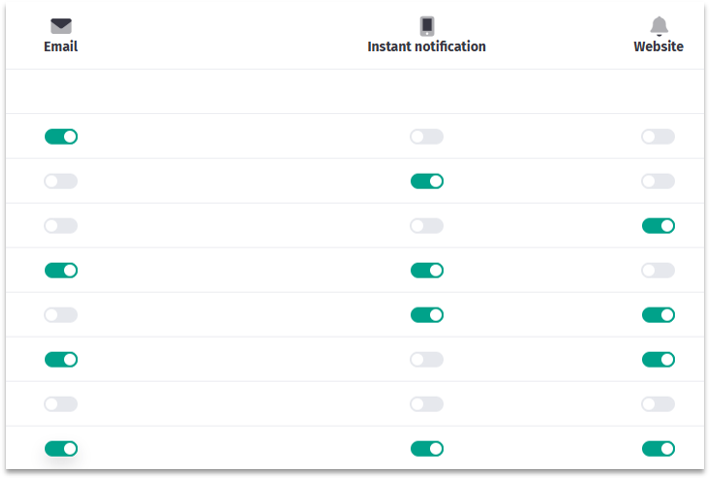
For the platform administrators and employees having the Staffing role, two notifications allow you to choose for which specialties you wish to receive an email. To do this, select the relevant specialties in the drop-down menu. Don't forget to activate the respective toggle and save.
If a specialty is not selected by any of the organization's administrators, a warning will be sent to all administrators ensuring that at least one of them adds it to their notifications. The same warning will be sent to employees with the Staffing role if a specialty has not been chosen by any of them. Please note that these two roles are managed independently: the system will send the alert to the concerned group even if an administrator has already selected the specialty in question. |


Here is an explanatory video covering the information described above: Video: All - How to manage my notifications?.
Was this article helpful?
That’s Great!
Thank you for your feedback
Sorry! We couldn't be helpful
Thank you for your feedback
Feedback sent
We appreciate your effort and will try to fix the article